How to Check Motorcycle Oil Level (5 Steps)
Disclosure: We may get commissions for purchases made through links in this post.
Motorcycles are characteristically so reliable that some owners forget they require regular inspection and maintenance. And out of the many facets of a two-wheeler, one of the easiest things to miss is checking its overall health and amount of engine oil.
This could be a matter of negligence for some motorheads. But for others, they simply do not know how to check motorcycle oil levels.
Checking motorcycle oil levels entail easy-to-follow steps and strict adherence to OEM recommendations in the service manual. The whole process is relatively similar to that of a vehicle — though there are slight variances depending on if you have a dipstick, gauge, level hole, or oil level window.
I have gone ahead and enumerated a more detailed rundown of how to check motorcycle oil levels below:
- Park your motorcycle on a flat, even surface.
- Take out the oil dipstick, wipe it clean, and place the rod back in to get an accurate oil reading.
- For bikes with an oil level window on the engine casing, check motorcycle oil levels through this ‘peephole.’
- For thumpers with an oil gauge, remove it (with pliers if needed), clean it, and dip it back in its socket to get an accurate engine oil marking.
- Determine if the oil reading is zero, low, or high, and do the needful accordingly.
In truth, checking engine oil levels in a motorcycle is easier than it looks. This statement stands true regardless if you have the latest liter-class sport bike or your grandpa’s old-school thumper.
The steps outlined in this guide may be non-exhaustive. But when followed to the T, they will help guarantee the longevity and optimal performance of your favorite commute and adventure buddy.

How to Check Motorcycle Oil Levels
The steps on how to check the oil in a motorcycle are (for the most part) similar to how it is done on an automobile. However, there are certain nuances in the process specific only to the former.
Nonetheless, your owner’s manual should outline OEM-recommended steps for examining oil levels. Less experienced motorheads need not worry too much, as they can inspect their motorcycle oil at home without professional assistance.
1. Park your two-wheeler on a flat, even surface.
Use your thumper’s center stand or aftermarket paddock stands like FG Gubellini Rear Paddock Stand (view on Amazon) if it is not equipped with one.
If you are checking on engine oil levels, do the following:
- Keep the motorcycle idling for 10 minutes to help the lubrication circulate throughout the engine.
- Turn the ignition off after.
- Allow the engine oil to cool down for 15 minutes. During this time, the lubricant can drain and return to its natural position.
You have the prerogative to not perform the above steps. But if you intend to examine the quality of the motorcycle oil, warming up and cooling down the lubricant should never be skipped.
2. Check the level with a dipstick.
If your two-wheeler has a dipstick, take it out, wipe it clean, and dip it back in to get an accurate reading of motorcycle oil levels. Otherwise, proceed to step #3.
3. Check the level through the engine casing.
If your motorcycle has an oil level window, simply check the motorcycle oil level through the transparent window on your motorbike’s engine casing. Otherwise, proceed to step #4.
4. Remove and clean the oil gauge.
Remove the oil gauge from the motorcycle using pliers and clean it. Do not rely on the engine oil gauge before it is cleaned when determining oil levels since the pressure inside the engine causes the oil gauge to be wet (hence, skewing oil level readings).
Revert to your owner’s manual for steps on how to clean your oil gauge. Specifics on doing this vary, depending on whether you have an electrical or mechanical oil gauge.
5. Place the oil gauge back and check the reading.
After cleaning the gauge, fully dip it back into its socket (without screwing it in), and see if the oil level falls between “full” and “low” markings.
If you get readings outside these two options, check if relevant systems are causing the abnormal readouts.
- A ‘zero’ reading could mean a faulty gauge, low engine oil level, or damaged oil pump.
- A ‘low’ reading could indicate engine oil leaks (for mechanical gauges) or a drastic drop in oil pressure.
- A ‘high’ reading could signify a faulty pressure relief valve, plugged oil delivery lines, excessive engine oil, condensation, or high oil pressure.
Regardless if you have a carbureted, fuel-injected, 2-stroke, or 4-stroke thumper, there is only one rule to follow — check your engine oil levels frequently. Doing so helps ensure adequate motorcycle engine oil and keeps complications from low oil levels at bay.
How to Check Motorcycle Oil: Tips
Using a Dipstick
For two-wheelers with screw-in dipsticks, it is vital to know if they need to be in an upright position (with both wheels planted firmly on level ground), on a main/center stand, or “Do you check motorcycle oil on a kickstand?”
As it is, not heeding OEM recommendations on how to properly check motorcycle oil may result in you obtaining inaccurate oil level readings. To add, using a lint-free cloth is best when wiping the dipstick clean — to ensure no contaminants cling to the oil dipstick.
When reinstalling, you should never overtighten nor cross-thread screw-in oil dipsticks. To prevent seals from sticking, apply a smear of oil on them before tightening.
If you mistakenly overtighten the dipstick, do not attempt to have it come loose by hitting it with something hard. Instead, gently turn the dipstick with a pair of bullnose pliers (view on Amazon).
When Hot or Cold
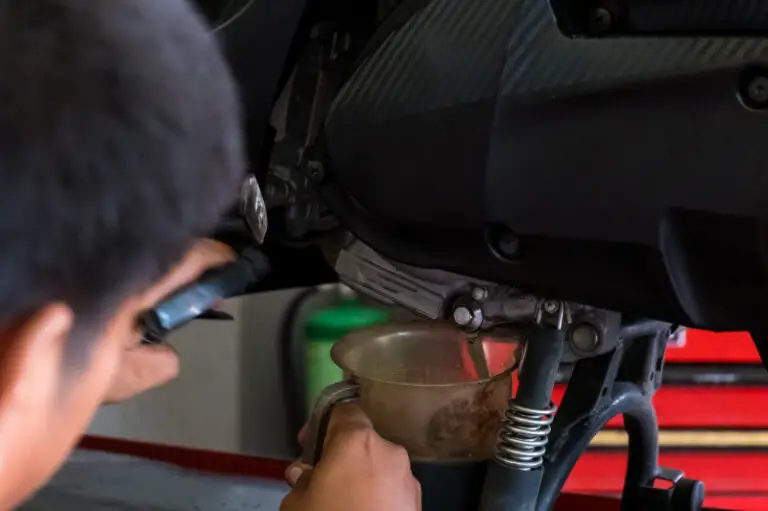
Never rush into checking motorcycle oil levels right after idling the engine, as you risk severe scalding if extremely hot engine oil gets on your skin.
Inversely, be patient when measuring cold engine oil levels, as it takes a while for cold lubricant to settle and reach the dipstick area.
Through Visual Inspection
In instances where you experience overheating and other performance issues, you may need to change engine oil even if your oil readings indicate ample amounts of lubrication.
So apart from checking actual oil levels, you may want to also inspect the quality of your motorcycle oil via its color and smell.
Engine oil in good condition is usually goldish or amber, viscous, and translucent. Meanwhile, engine oil in poor condition typically shows the following characteristics:
- Black or murky, meaning it has lost its lubricating properties and needs to be immediately replaced
- Whitish or creamy, meaning you have a blown head gasket or engine oil contaminated with coolant and needs to be flushed out and replaced soon.
- With visible particles or metal shavings (indicative of engine wear)
- Gas-smelling (an urgent indication to take your two-wheeler to the nearest repair shop)
Vintage vs. Modern Bikes
In classic motorcycles, you can check motorcycle oil levels through a level or ‘weep’ hole. This hole has a bolt or screw that needs to be undone.
If engine oil comes gushing out of this orifice, you have too excessive engine oil in your machine. Otherwise, the amount of oil seeping through the level hole would be small, appearing like a teardrop.
Telltale Signs Your Motorcycle Needs Oil

Enthusiasts with modern two-wheelers need not worry about low-oil symptoms since their wheelers have sensors that ascertain engine oil levels. However, ardent patrons of the used-bike market (myself included) may not have this luxury at their behest.
Pair that with infrequent engine oil inspection, and a motorhead is likely to experience one of the following aftermaths long before their next scheduled oil change interval:
- Blinking or flashing Check Engine Light or oil light
- Decreased fuel efficiency
- Engine seizure
- Failed emissions testing
- Idle noises coming from pre-ignition sounds
- Increased engine vibrations or shuddering
- Knocking or detonation
- Overheating
- Performance issues (Engine stalling or failing, rough idling)
- Reduced power output or power loss
- Starting issues
Most of these items stem from engine oil depletion that is too far gone. That said, knowing when an oil refill/change is needed would make a world of difference in keeping your motorcycle in tip-top shape and functional.
Conclusion — Steps on How to Check Motorcycle Oil Level
To summarize, here are the steps on how to check motorcycle oil levels:
- Park your motorcycle on a flat, even surface.
- Take out the oil dipstick, wipe it clean, and place the rod back in to get an accurate oil reading.
- For bikes with an oil level window on the engine casing, check motorcycle oil levels through this ‘peephole.’
- For thumpers with an oil gauge, remove it (with pliers if needed), clean it, and dip it back in its socket to get an accurate engine oil marking.
- Determine if the oil reading is zero, low, or high, and do the needful accordingly.
Whether you are an enthusiast or a recreational rider, having a working knowledge of the above procedure is necessary. After all, engine oil is the lifeblood of any vehicle and the one responsible for the smooth operation of different motorcycle components.
Maintaining adequate lubrication should never be treated as a chore, as it allows you to get the most out of your two-wheeler!


