Harley Davidson Check Engine Light Stays On (Fix)
Disclosure: We may get commissions for purchases made through links in this post.
The dreaded Check Engine Light happens not only to vehicles but also two-wheelers – and HD motorcycles are no exception. Thankfully, these iconic American bikes have a diagnostic system that makes pulling DTCs and resolving them a tad quicker for owners and motorheads. This guide delves into the specifics of identifying causes and resetting the Harley Davidson Check Engine Light.
If your Harley Davidson Check Engine Light stays on, it could indicate a current error code or a compromised component that has been overlooked. There’s no way to know just by looking at your motorcycle – which is why pulling error codes, resolving root causes, and resetting the CEL is important.
Unlike in vehicles, a high-spec diagnostic scanner is not always required when tending to your Check Engine Light. However, good working knowledge of the motorcycle’s diagnostic system and a copy of the owner’s manual are needed. These things are what I aim to help you with as I discuss the lowdowns of dealing with the Check Engine Light on motorcycles in this article.

Check Engine Light (Cars vs. Motorcycles)
The Powertrain Control Module or PCM alerts the driver whenever it recognizes a potential problem with the vehicle. Warning light indicators – usually orange, yellow, red, or amber in hue – are flashing or solid and typically accompanied by a legend or pictogram related to the identified issue displayed on the dash or instrument panel.
This description still stands true for automobiles. But what about motorcycles? Is there a difference?
Function-wise, there is no difference in the CEL between four- and two-wheelers. The warning light indicators and their corresponding fault codes serve the same purpose – to make the driver aware of a current or impending problem with their transport.
Like in vehicles, the Check Engine Light on motorbikes can be misunderstood, too, as it sometimes flashes alongside one of the following tell-tale lights. (But if we were to be more specific, there are some slight nuances between a Check Engine Light found on most vehicles and that on a Harley Davidson.):
- Engine temperature warning light
- Ignition light
- ABS warning light
- Oil pressure warning light
- Engine management warning
- Neutral light
- Indicators and hazard warning light symbols
Harley Davidson Check Engine Light
Unlike automobiles, motorcycles were not mandated to adopt the standardized SAE convention for identifying and labeling onboard faults until recently. Cars have been OBD-compliant since 1991, while motorbikes did so in 2021 (and only for certain markets like the EU). Harley-Davidson was one of the earliest OEMs to adopt this standard in their product offerings in 2013. As of 2017, HD motorcycles have used the 15765 or CAN protocol currently implemented across all vehicles.
This is not to say that older HD models do not have a Check Engine Light that riders can work with. The advent of CEL on the dashboard goes back way longer than the introduction of fuel injection in HD’s motorcycle lineups. And the American manufacturer has had fuel-injected two-wheelers like the Electra Glide since 1995.
Another good thing about Harley Davidson motorcycles is that you do not need to always use an OBD-II diagnostic tool like TechnoResearch Centurion Super Pro Plus (view on Amazon) to interpret the trouble codes that come with the CEL or to stop the light from staying on.
In most cases, you can enter the diagnostic system and pull the error code by pressing the trip reset button (more on this later). The only instances a scanner is required are the following:
- owning an old, carbureted model
- inability to retrieve an error code from the bike itself, and the CEL is still not reset
You will just need an HD-specific adapter/harness to connect the bike’s diagnostic port to an OBD-II scanner to make this happen and the manufacturer’s fault code chart or list for reference. HD owners vouch for OBDLink MX+ OBD2 Bluetooth Scanner (view on Amazon) and HealTech OBD Tool if you need to go this route.
How to Check/Read Trouble Codes on a Harley Davidson
Delphi EFI ECM (2000–2003 Models)
- Turn the ignition switch to “OFF.”
- Remove the motorcycle’s right side panel to access the data link connector.
- Next, remove the data link connector’s protective plug.
- Connect the jumper wire you made to the 1st and 2nd terminal on the data link connector.
- Turn the ignition “ON.” Wait 10 seconds (for the motorcycle to do a quick systems check). The light should turn on for 4 seconds, then off for 6 seconds. After these 6 seconds, any trouble code stored in the system will appear as “sequential flashes.”
- When the lamp flashes, count the number of times it does, as this indicates the 1st code. The flashing will repeat three times. Then, there will be a 3-second pause before the ECM plays the next code.
- Record all the codes (as you did with the first one) and refer to your owner’s manual for matching faults.
- Once code retrieval is complete, turn off the ignition switch and remove the jumper wire.
- Put the right side panel back in place.
Delphi EFI ECM (2004–2006 Models)
- Do step #1 as stated above.
- Set the “RUN/STOP” switch to the “RUN” position.
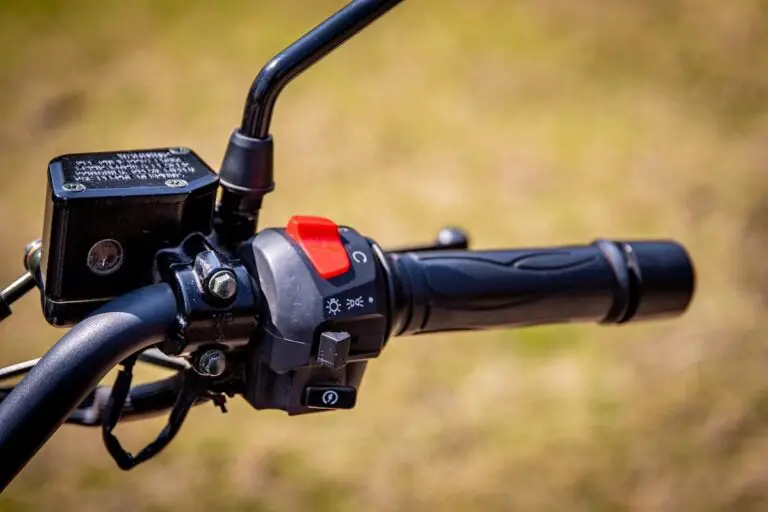
- Push the trip/odometer reset button in and hold. For post-2014 touring models, this button is located on the left control mount and looks like a toggle switch. Older bikes may have it behind the speedometer.
- Turn the ignition switch on and release the trip/odometer reset button. If you did this step correctly, you should see the speedometer needle sweep across the speedometer and display “DIAG.” All indicator lamps and background lighting should also activate.
- Press the trip/odometer reset button once and wait for the selection menu “PSSPt” to show. Each letter in “PSSPt” pertains to an area of diagnostics testing. You should see the current selection (first “P”) flashing.
- Use the trip/odometer reset button to scroll through the different components for testing.
- Once you have selected a suspected module or component, press and hold the trip/odometer reset button for five seconds before releasing. If there is any code stored, it will display on the speedometer. Otherwise, the speedo will show “NONE.”
- Continue to utilize the trip/odometer reset button to view additional codes.
- Record all the codes you pulled and check them against your owner’s manual for matching conditions.
- Once code retrieval is done, turn the ignition switch off and exit the diagnostics testing.
- Note that on HD models with no tachometer, “No RSP” (meaning no response) will show if you select the tachometer identifier. The same will display if the “RUN/STOP” switch is off during the procedure.
Tip: If the code you pulled does not clear after pushing in and holding the trip/odometer reset button (or even after shutting the motorcycle down and rechecking the fault codes), you have a current error code.
Jumper Wire
For HD motorcycles with Delphi ECMs, creating a diagnostic jumper wire before performing the above steps is required. For the jumper wire, you will need to strip both ends of a 3-inch piece of wire with a wire stripper tool. After which, attach a female spade clip to the stripped wire ends. Lastly, crimp each end with the wire stripper tool (view on Amazon) and Voila!
For all other ECM models like J1850 and 32534-05C, check your owner’s manual to see if the steps detailed here are compatible with the said ECMs. If the error codes cannot be retrieved using the procedure described here, procure a scan tool specific to the ECM models mentioned.
Even with the Delphi ECMs, not just any OBD-II scanner will do. Savants recommend PCHUD from ACDelco. According to these experts, this 1993 software is the only one capable of deciphering Delphi error codes. On the downside, this tool is quite pricey and does not run on 64-bit Windows.
Check Engine Light Triggers

Several factors could set off the Check Engine Light on a Harley Davidson – at least 340 of them are in the motorcycle’s diagnostic system. We will not enumerate each in this section (that will be information overload).
Instead, I will help familiarize you with different HD trouble code legends and categories so that you know where to look when you get an error from the two-wheeler. I will also share helpful online references (see below) in case you are currently working on a fault code or feel like having a personal copy for future use:
These provide a near-complete rundown of Diagnostic Trouble Codes saved in HD diagnostic systems. (Note that they are not encompassing – it is still best to refer to the owner’s manual that came with your bike):
Once you have had time to scan these links, you will realize that HD fault codes are not too different from those found in vehicles. The individual modules are just segregated and abbreviated differently, as seen below:
Newer HD Motorcycles:
- ECM: Electronic Control Module
- BCM: Body Control Module
- SPDO: Speedometer
- RAD: Radio
Older HD Motorcycles:
- P: ECM
- B: ABS module
- B: Radio, Instruments, BCM modules (in some models)
- C: ABS module (in some models)
- U: Communication module
- S: TSM/TSSM
- SP: Speedometer
- T: Tachometer
The general format for HD fault codes is, more or less, similar to DTCs for vehicles. It is alphanumeric, with the letters indicating the affected system or module and the numbers denoting the problematic part or component within the module causing the error code (may not always be concurrent with an illuminated Check Engine Light).
Lastly, I will cover the most common reasons behind an activated Check Engine Light and their corresponding fixes in the next section:
Why Your Harley Davidson Check Engine Light Stays On
Based on feedback shared by motorheads in HD-dedicated forums and by experts in other online resources, here are the top five reasons why their CEL activates and stays that way. Interestingly, not all of the items in this list are related to the motorcycle’s fuel system, emissions, and air intake:
Loose Gas Cap
In this scenario, the ill-fitted gas cap disrupts the motorcycle’s fuel delivery and fails to keep this closed system under correct pressure – resulting in fuel loss. The fix is as easy as inspecting the gas cap O-rings if dilapidated (and replacing them as necessary), tightening the fuel cap, or topping off fuel at the nearest pump station to turn the CEL off successfully (after a few drive cycles, that is).
But there are rare occasions where a crack in the fuel filter shell (leading to loss of pressure) is responsible for triggering the Check Engine Light.
Faulty Sensors or Sending Units
The affected components are usually defective O2 and MAF (Mass Airflow) sensors. Because these sensors play a crucial role in the bike’s air intake and combustion process, they cause many other problems.
Some include reduced fuel economy, fouled spark plugs, emissions test failure, and damaged catalytic converter (among others) – apart from a CEL that would not go off.
O2 and MAF sensors typically go out due to contamination or excessive additives in the engine. Once identified as the culprit, there is no way to resolve it other than to replace the defective components.
Potential Brake Failure
When the Harley Check Engine Light comes on after starting the engine, you may be dealing with a brake issue – one of HD’s most prevalent issues. According to Hot Cars, approximately 174,636 motorcycles are affected by this problem.
As it turns out, the problem is owners forgetting to flush DOT 4 brake fluid as recommended by the OEM, resulting in brake fluid gelling and building up in different brake components – eventually reaching the apply valve of the ABS Hydraulic Control Unit. This issue may trigger a “B” or “C” fault code and requires a more complex fix if addressed in its later stages.
Vacuum Leak
Although most Harley motorcycles are equipped with a manifold gauge, they are still not 100% safe from vacuum leaks. Due to hard riding, the bike’s vacuum system (along with shaft seals and rubber boots) can develop cracked fittings or loose connections, which eventually translate to excess air entering the system and upsetting the air-fuel mixture.
Similarly, extreme temperatures can cause the vacuum hose to become bone-dry and brittle (making it prone to breakage). It is easy to tell if your motorcycle has a vacuum leak, as it will display the symptoms below.
Unfortunately, the reverse is true when resetting the Check Engine Light and fixing the issue.
- Running lean
- Bucking at high RPMs
- Constant loss of power
- Erratic or rough idling
- Difficulty in cold-starting the engine
- Setting off the Check Engine Light and a bunch of relevant codes
Installation of Aftermarket Accessories

Add-ons are often overlooked as the cause behind an illuminated Check Engine Light, but they should not be. Given the degree of mods done on a Harley, it is pretty easy for an aftermarket component to upset the motorcycle’s balance.
If you install an auxiliary light on the bike, for instance, you increase the current flow in the circuit where the aux light is connected. Consequently, the motorcycle sees this new current flow as abnormal, prompts the ECU to shut off the said circuit completely, and triggers the CEL to flash non-stop.
In this scenario, a Harley Davidson Check Engine Light reset will not happen until the issue is resolved and the bike recognizes the increased current flow as normal. Sometimes, the resolution may even require using an OBD-II scanner and re-mapping the ECU.
Other CEL-related issues worth mentioning are as follows:
- Bad water pump (common for 2014–2016 touring models)
- Blown fuse, spark plug and ignition coil issues
- Charging system issue
- Defective PCM/ECM/ECU
- Faulty catalytic converter
- Low oil pressure
- Mechanism malfunction
- Non-adherence to periodic maintenance
- Overheating, thermostat issues
Resetting a Harley Davidson Check Engine Light
It only takes five seconds to press the trip/odometer reset button to clear or reset the Harley Davidson’s Check Engine Light (provided you are not dealing with a current fault code). You would be able to verify this is the case since you will see the “CLEAR” display on the speedometer after doing the step I just described.
If you pulled several error codes, you naturally have to repeat this procedure until you can clear all of them. Lastly, I highly recommend doing a road test to ensure the codes you just cleared do not return. Some DTCs require a certain number of drive cycles before they can be completely erased from your motorcycle’s diagnostic system.
Conclusion – Harley Davidson Check Engine Light Stays On (Fix)
Addressing a Harley Davidson Check Engine Light that stays on is not as difficult as how most people imagine it. It is quite the contrary, actually. Unlike vehicles that require an OBD-II scanner to retrieve codes and start diagnosing their wheelers, Harley motorcycles rely on the diagnostic tool embedded in its system.
The degree of ease in pulling error codes and performing a CEL reset may not be the same for all HD models. But the overall process is still far simpler than what you would need to do on a vehicle.
That said, performing the procedures in this article still requires a certain level of mechanical inclination. After all, your motorcycle may have issues more complicated than a loose fuel tank cap. When this happens, tend to whichever fault you can resolve on your end, and never hesitate to get help from a mechanic or technician when warranted.