How to Clean a Motorcycle Carburetor (9 Steps)
Disclosure: We may get commissions for purchases made through links in this post.
For average motorheads, autumn heralds the end of the riding season — the best time for spring carb cleaning alongside ‘winterizing’ their motorcycles. But for the few brave souls who ride non-stop all year round, their carbs can get gummed up whenever, making cleaning a motorcycle carb a must-have skill. That said, let us cover the fundamentals of how to clean motorcycle carburetors in this article.
The best way to clean a motorcycle carburetor entails correctly identifying and carefully dissecting the carb, using A-grade cleaning solutions, replacing gaskets, and doing a test drive. Depending on the design complexity of your carb, the entire process may comprise more than seven steps.
Below is a more detailed breakdown of how to clean a carb on a motorcycle:
- Do preliminary checks.
- Empty the fuel tank and turn the petcock off.
- Drain the fuel bowl.
- Remove the bowl.
- Clean the fuel bowl.
- Remove float, needle valve, and jets.
- Clean the jets.
- Reassemble the motorcycle carb with fresh gaskets.
- Top off your tank and do a test drive.
Sometimes, a light-duty cleanout is all there is to restoring a carburetor to near-mint condition. At other times, a full-blown cleanup with a carb rebuild is necessary.
In either situation, sound working knowledge of how to clean a motorcycle carburetor will come in handy. Hence, today’s guide aims to equip you with the necessary information.

Different Types of Motorcycle Carburetors
Before we delve first into today’s article, it would not hurt to get acquainted with the different kinds of carburetors — there is more to them than just throttle-slide or constant-velocity types, as seen below:
- Convertible Sliding or Variable Venturi
- Hard Risk
- Fixed Speed or Vacuum
- Corporator B.
- PJ Corporator
- PWL Corporation
- Corporator DM
- DMX Corporator
While I will leave you to research these carbs in your own time, this I have to say. Some designs have a higher proclivity to dirt accumulation than others. For instance, a fixed Venturi carburetor may be more prone to plugging due to its more primitive tech and non-adjustable Venturi diameter. Expectedly, this specific motorcycle carb is predominantly found in vintage two-wheelers.
Clogged Motorcycle Carb Symptoms
Compromised fuel delivery and potential parts replacement are only two of the many outcomes resulting from a clogged and unattended motorcycle carburetor.
To avoid these kinds of repercussions, be on the lookout for the following and immediately address the early stages of these indicators:
- Performance issues (backfiring, poor idling, sputtering)
- Starting and acceleration issues
- Decrease in or loss of power
- Cold starting becomes difficult
- Reduced fuel efficiency
- Engine running lean or rich
- Overheating problems
- Hesitation under load
- Carburetor flooded with fuel
- Black smoke from the exhaust pipe
How to Clean a Carb on a Motorcycle
Before you take on this seemingly Herculean task, make sure you have the following essentials:
- Carb and parts cleaner (optional)
- Carb washer or motorcycle carburetor cleaner
- Carb sync tool for motorcycle like a 6-Channel The Digi Sync | Digital Carb Sync Tool Model DS3 (view on Amazon)
- Gasket set or carb rebuild kit (optional)
- Hand sanitizer
- Organic vapor resistor
- Pliers
- Safety gloves and goggles
- Screwdriver (Phillips, flathead), hand tool, or special tool to loosen nuts, bolts, and screws
- Wire or stiff-bristled brush
- Wrench or socket set
1. Do Preliminary Checks.
This step is excluded from most articles featuring how to clean carburetors on a motorcycle, but there is a good reason why that should not be the case.
When a carburetor gets plugged or gummed up, it is not always because of the carb itself. Components affecting your two-wheeler’s starting routine are potential culprits too — which is why it would be wise to check on their condition.
Anything out of the ordinary could signify a busted battery or a forewarning of a full carb rebuild. That said, your preliminary checks should include a thorough inspection of exhaust and ignition systems (including the motorcycle battery).
Once these components check out, it will be easier to concentrate on cleaning your motorcycle carburetor.
2. Empty the Fuel Tank and Turn the Petcock Off.
To do this:
- Loosen the push-and-pull cables on the throttle and disconnect them from the carburetor.
- Unbolt the motorcycle carb from the manifold.
- After which, bring it over to your workstation.
3. Drain the Fuel Bowl.
Once the petcock is turned off, loosen the drain screw (the large nut you see on your fuel bowl) to let old remaining fuel and gunk out.
Not all carburetors come with drain hoses attached to the fuel bowl’s drain plug, so make sure you have one attached to the said port before even beginning this step. Remember to re-tighten the drain screws once done before flipping the carburetor over.
Note: Japanese carburetors use softer JIS fasteners, while others use Philips-head ones. That said, use the appropriate screwdriver or special tool so that you do not strip the hardware holding the drain plug in place.
But if screw stripping cannot be helped, hex-head screws or knurled extended bowl screws make good replacements.
4. Remove the Bowl.
After completely draining the fuel bowl, it is time to separate it from the carburetor body. Like the above, you need only use the appropriate tool when performing this step, and your fuel bowl should slide off easily.
If it does not, light tapping with a rubber mallet (not aggressive yanking) should do the trick — your patience will also spare you from unnecessarily buying brand-new gaskets.
5. Clean the Fuel Bowl.
If you have successfully removed the fuel bowl in one piece, you should now be staring into your carburetor’s float bowl (which looks like a black, round thing for most carb types). Immediately recognizing it and its placement is extremely important, as you need to work around it when cleaning and ensure it does not get punctured.
As for the fuel bowl itself, get rid of any crud you find. Motorcycle carb cleaners or kerosene are effective cleaning solutions in eliminating filth on the bowl that may be plugging your jetting.
6. Remove the Float, Needle Valve, and Jets.
Compared to dealing with the float bowl, you will need to be extra cautious when removing jets. Additionally, you cannot compromise by using the wrong tools. Otherwise, your carb jets will end up mangled.
Depending on your motorcycle’s carb type, you may require an S&S jet tool, pliers with cloth padding, or a flathead screwdriver.
7. Clean the Jets.
In cleaning carb jets, motorheads opt for either the easy way or the backyard method, according to RevZilla. The former entails chemical usage, whereas the latter is a more ‘mechanical’ approach.
Either methodology has been proven to work, although the backyard approach demands more skill and caution. This is not to say, however, that you can use chemicals and just wing it.
Mechanics and experienced motorcycle owners could not stress enough how sensitive carb jets are. After all, they are super-precise equipment that facilitates correct air-fuel ratio and proper combustion. It is of utter importance that they are maintained clog-free, lest pesky starting issues will be the least of your worries.
After cleaning the jets, it is best to visually inspect them and see if their orifice appears round and permits light to pass through. You will need to continue cleaning them if neither of these conditions is met.
8. Reassemble the Motorcycle Carb With Fresh Gaskets.
At this point, you will need to do everything in reverse. Start with reinstalling the discharge tube, putting back the jets, and setting new gaskets and the fuel bowl in place.
Once all parts have been put back together, reinstall the motorcycle carburetor (that is, after generously spraying the inside of carb components with a motorcycle carb cleaner).
If you exercised caution in the earlier steps, you should be able to reuse your existing gaskets when reinstalling the carburetor. But a good best practice is to use brand-new ones instead. Not only do they fit snugly with clean carb components, but they are also a great preventive measure.
9. Top Off Your Tank and Do a Test Drive.
Fill your fuel tank with fresh gasoline or diesel, hook your battery to a donor battery from a car or truck, turn the petcock on, and give your thumper a “prime wick or two.” If it roars to life with no issues, pat yourself on the back!
If it does not quite perform the same way as it did before you cleaned the motorcycle carb, then give your carb an ample amount of fuel solvent and take your two-wheeler for a spin to make it run the way it should.
The ‘test drive’ element here is crucial. This piece triggers a motorcycle carburetor to pull the fuel solvent through tiny orifices, eradicating any hidden filth you may have missed cleaning.
How to Clean a Motorcycle Carb Without Removing It
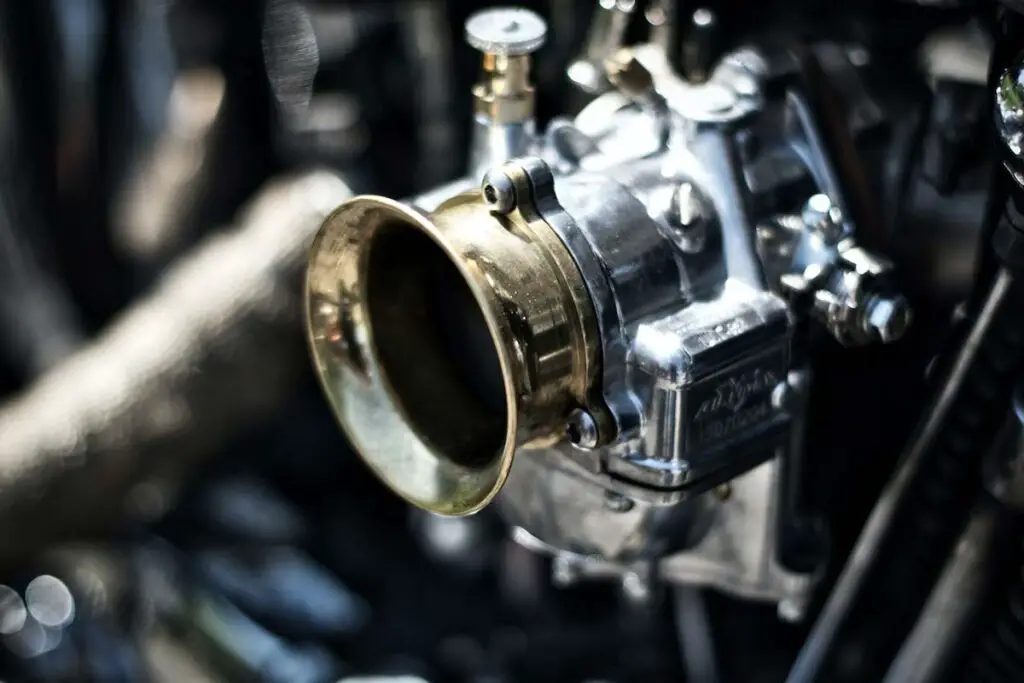
Let’s face it, removing a motorcycle carb just so you can clean it can be a daunting task for freshies and less experienced riders. For others, the process is simply a pain to go through. Not all motorcycle enthusiasts would want to deal with intake boots and throttle cables each time they have to get rid of gunk.
The good news is that premium-quality motorcycle carburetor cleaners (among other things) make cleaning a carb without removal possible. Should you prefer to go this route, here is a full rundown of steps to follow:
1. Take off the Airbox or Pod Filters.
Removal of these parts exposes the rear of the carburetor (the part where the butterfly valves are visible), giving better access to the carb in question. However, note that this step only applies to motorcycle carbs sitting behind the power mill towards the center of the two-wheeler.
Unlike a motorcycle carb, removing these components can be done more easily (the same goes for reinstalling them).
2. Make Sure No Gas Is Running Out.
You can ascertain this by turning the petcock to the OFF position before trying to access your motorcycle carburetor. Also, ready some paper towels, rags, or cloth at the base of the carburetor, as gas leaks are likely to happen when the bottom bowls are off.
3. Spray a Carb Cleaner for Motorcycles Inside the Fuel Bowl.
Do this once the fuel bowl is off and every few minutes to loosen dirt and grime that may have stuck to the bowl surfaces.
Once the solution has done its magic, reattach the fuel bowl, start your engine, and see if there is an improvement in carb performance. Otherwise, repeat the step until you have achieved your desired results.
4. Remove the Floats Inside the Carburetor.
Doing so will give you access to what is behind it. Detaching the float is convenient, as its only attachment is a small wrist pin that you can easily push through. You would also know that you have detached the floats correctly once you see the “rocket ship” shaped plug come off too.
(Tip: While at it, test the floats by placing them inside a bowl of water. The expectation is that they should float. Otherwise, have these components replaced as soon as possible.)
5. Unscrew the Primary and Secondary Jets.
Visually inspect them and see if light passes through their orifices. Clean them if they appear clogged. And as much as possible, refrain from using ethanol blends as these fuel variants contribute to the clogging of carb jets.
6. Spray Carb Cleaner All Over Your Motorcycle Carburetor.
It is similar to step #3, except that this time, you are spraying the insides of the carburetor and not only the fuel bowl. You also do not have to spray repeatedly.
Once you have sprayed an ample amount on the inside and outside of the carb, wait a few minutes for the carb cleaner to take effect. After which, put all the carb parts back together. The last piece you should reinstall is the fuel bowl at the carb’s bottom.
7. Test How Well Your Two-Wheeler Runs.
Warm it up to normal operating temperatures. If you successfully and thoroughly cleaned your carburetor, there should be a noticeable improvement in both carb and engine performance. Otherwise, you may have to repeat the entire procedure or reinspect the components for any spot you may have missed.
When doing this step, it is okay to leave the air intake filters momentarily off. This way, you can reaccess the carburetor should you need to. Only reinstall the air intake filters and pods once you are satisfied with the cleanliness and performance of your motorcycle carburetor.
Recommended Motorcycle Carb Cleaning Intervals
Depending on the carb type, terrain, or riding conditions, carburetor tuning and idle speed adjustment are a must every six months to two years. For a carburetor cleanup, however, the ideal is at least twice a year.
Daily commuters and weekend warriors need not worry much about routine carb maintenance. After all, frequent riding is a cleaning mechanism of these components in itself.
However, the reverse is true for dormant motorcycle owners. Their thumpers are more prone to grime and dirt buildup due to disuse and, therefore, more likely to necessitate recurrent cleanups.
Top 10 Picks — Motorcycle Carb Cleaners
- Berryman Chem-Dip Carburetor
- Gumout 800002231-6PK Carb and Choke Cleaner (view on Amazon)
- Gunk M4814-12PK Chlorinated Carburetor Parts Cleaner (view on Amazon)
- CRC Carb and Choke Cleaner
- Berryman B-12 Carb Cleaner
- Gumout 510021 Fuel Injector & Carburetor Cleaner
- Gunk M4815NC Non-Chlorinated Carburetor Parts Cleaner
- Liqui Moly Cleaner
- Sea Foam SF-16 Motor Treatment (view on Amazon)
- WD-40 Throttle Body Cleaner*
* Regular WD-40 variants are essentially light lubricants (oil) and should never be used instead of a proper motorcycle carburetor cleaner.
Conclusion – How to Clean a Motorcycle Carburetor
In conclusion, here are the steps on how to clean motorcycle carburetors:
Removing the carburetor:
- Do preliminary checks.
- Empty the fuel tank and turn the petcock off.
- Drain the fuel bowl.
- Remove the bowl.
- Clean the fuel bowl.
- Remove float, needle valve, and jets.
- Clean the jets.
- Reassemble the motorcycle carb with fresh gaskets.
- Top off your tank and do a test drive.
Without removing the carburetor:
- Take off the airbox or pod filters.
- Make sure no gas is running out.
- Spray a carb cleaner for motorcycles inside the fuel bowl.
- Remove the floats inside the carburetor.
- Unscrew the primary and secondary jets.
- Spray carb cleaner all over your motorcycle carburetor.
- Test how well your two-wheeler runs.
On top of the information I shared in this article, I recommend referencing your owner’s manual for OEM-recommended procedures, tools, and cleaning intervals. Doing so not only ensures you follow the right steps but also turns the act of cleaning a motorcycle carburetor into a piece of cake.

