How to Clean Motorcycle Air Filter (13 Steps)
Disclosure: We may get commissions for purchases made through links in this post.
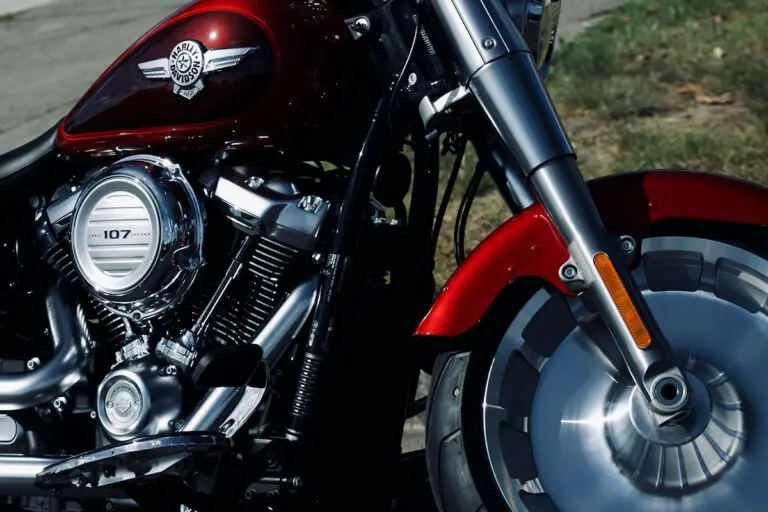
You may think a motorcycle air filter’s sole purpose is blocking pollutants, but it plays a more crucial role than you might expect. This component enables your two-wheeler to breathe fresh oxygen and efficiently burn fuel! And because of what it does for your bike, it deserves all the TLC it needs.
Here are quick steps to clean a motorcycle air filter: Start by shaking off debris from the filter. Then during the washing process, use warm water and a drop of dish soap or a filter-appropriate cleaning agent to get rid of old oil and dirt. Rinse the filter accordingly and squeeze off any excess water.
Air filters are usually tucked underneath the seat or fuel tank. Because of where they are placed, keeping them in tip-top shape has become all the more imperative. Thankfully, dealing with a dirty air filter does not necessarily always mean a replacement. With the help of this guide, you can clean your existing air filter depending on the type and severity of dirt accumulation with easy-to-follow steps!
Different Types of Motorcycle Air Filters
Before we get into the article, it would be best to learn more about the different air filters used on motorcycles and be able to differentiate them from one another.
Paper Filter (a.k.a. Paper Pleat Air Filter)
This air filter is a standard factory-equipped part and the predominant type of filter used across motorcycles. It is constructed from thin, porous paper material (somewhat similar to coffee filters) and pleated to increase the surface area of filtering dirt and dust particles from making their way into the engine. Paper filters are the simplest out of all the filter types.
- Pros: Inexpensive, highly effective in blocking off small particles that can potentially enter the engine, huge aftermarket support
- Cons: Cannot be cleaned (a dirty paper filter always warrants a replacement), gets easily clogged, airflow is not its top priority, not ideal for dirt/off-roading bikes, dusty riding conditions, or enhancing engine performance
- Price Range: $1.25 – $30+ **
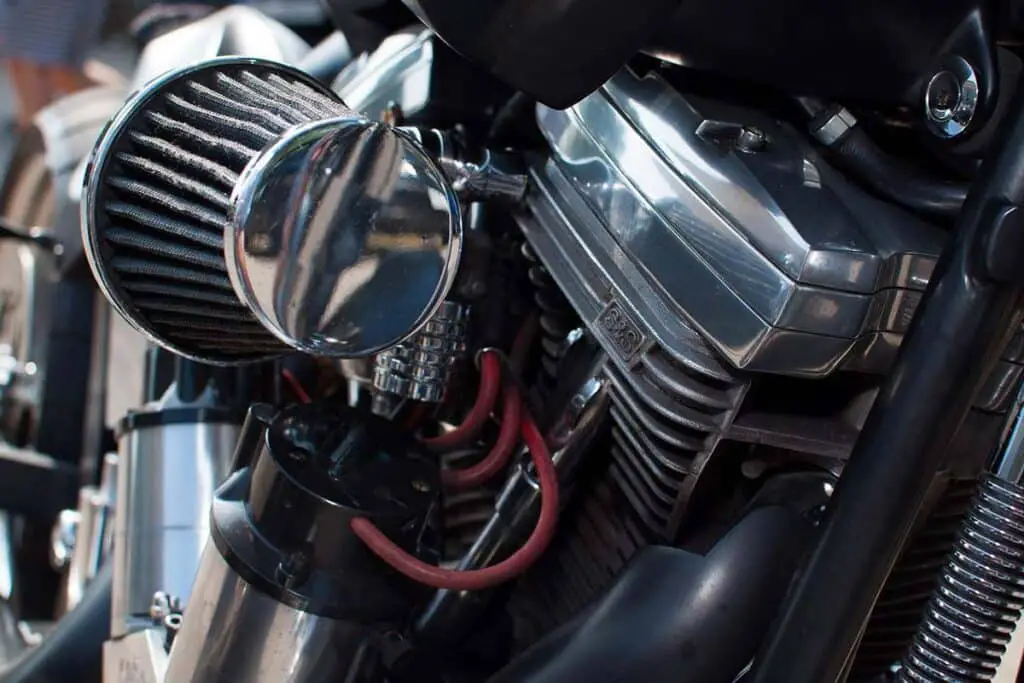
Foam Filter (a.k.a. Oiled Foam Filter)
Foam filters took over the market long before paper filters did. They are standard on most off-road and vintage bikes and are considered mid in terms of price and capabilities. A foam filter is slightly pricier than a paper filter but not as expensive as the cotton type. Quality-wise, it is great for air intake when you ride your motorcycle on clean roads but not as reliable on the dunes.
- Pros: Reusable, does not interfere with airflow sensors despite oiled filter surface, performs slightly better than paper filters in dusty environments
- Cons: Restricted breathability due to its dense material, clogs up faster than paper filters, some variants contribute to performance issues, frequent cleaning needed
- Price Range: $6.50 – $70+ **
Cotton Filter (a.k.a. Cotton Gauze Air Filter)
If paper filters are the most common, cotton filters are the most popular air filter types. They are put together using artificial fiber or cotton gauze fabric – “a strong and lightweight material suitable for filtering dust particles” (source: Bike Restart) – coated with oil and separated by wire mesh frames.
A cotton filter like a K&N motorcycle air filter (view on Amazon) is considered premium because it prioritizes air filtration and airflow. Because of these strengths, it is mainly used in high-performance two-wheelers.
- Pros: Strong air filtration due to its oiled surface, can be cleaned and does not require replacement that frequently, great for dusty riding conditions, can last thousands of miles (if maintained correctly), highly recommended when remapping/flashing the ECU or fitting your motorcycle with a performance exhaust, aftermarket air filter kits are easily sourced and can make cleaning more convenient, eco-friendly
- Cons: Pricier compared to other filter types, cleaning and reoiling requirements can be complicated, oil on the filter surface can sometimes enter into the airflow sensor and interfere with the latter’s function
- Price Range: $20 – $110+ **
** (pricier if you have a larger-displacement motorcycle)
Symptoms of Bad Air Filters
A dirt-filled air filter can escalate quickly to a bad/defective air filter when left unattended. Here are some indicators that you have been skipping on that much-needed air filter cleanup for far too long. (Several of these symptoms are also outcomes of ignoring to clean motorcycle air filters.):
- An unusual dark color (progressively gets darker the more accumulated dirt it has)
- Noticeable poor acceleration
- Reduced fuel economy
- Lack of (or reduced) power output
- Strange noises coming from the engine
- Performance issues (misfiring, engine stalling or failing, rough idling)
- Activated Check Engine Light
- Black smoke or glowing tailpipe
- Strong gasoline/fuel smell
How to Clean an Air Filter on a Motorcycle

Thanks to the above sections, we have identified what happens if you have a bad air filter, and only cotton and foam filters are reusable. To prevent experiencing any of the symptoms above, let us delve into the cleaning process for each filter type:
Cleaning Process for a FOAM motorcycle air filter:
- Before beginning the filter cleaning process, refer to your owner’s manual and check for procedural differences in cleaning the air filter. Doing so helps ensure you do not ruin any motorcycle parts or nullify your motorcycle insurance.
- Wear gloves for hand protection and ready your motorcycle air filter cleaner.
- Remove the foam from its housing and remove debris before washing by lightly tapping the foam filter over a trash bin. Do not forget to cover the airbox so that dust particles do not enter the intake port. Note: For this, you will need a GearWrench 84-Piece SAE Hex Bit and Socket Adapter Set (view on Amazon).
- Add warm water to a bucket and use it to wash off the majority of the gunk from the filter surface.
- Remove excess water from the foam filter without wringing.
- Give the foam filter a deeper clean using a mild cleansing solution (warm water with a drop of dish soap) or the degreaser included in the air filter cleaning kit – if you purchased one. Do this a few times (or until satisfied) to remove old oil and grime stuck to the filter surface.
- If using an air filter cleaning kit, thoroughly massage the entire foam material during the washing process, and continue spraying foam cleaner on the filter surface. Seeing dark, gooey substances dripping down would prove the foam cleaner is effective.
- Rinse the filter repeatedly (or as needed) to remove all of the soap or cleaning agent.
- Carefully squeeze the foam filter to remove excess water without twisting or wringing it out.
- Set the filter aside to dry thoroughly. You may clean the airbox or filter housing while waiting for the foam filter to dry.
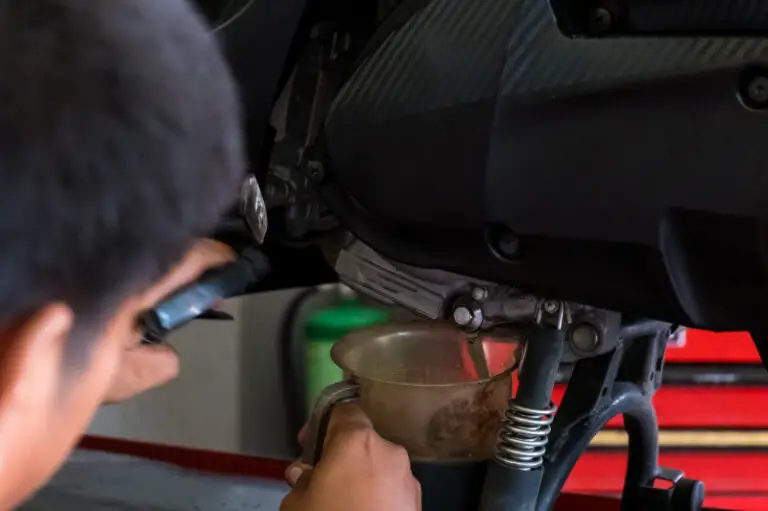
- Saturate the foam filter surface in fresh filter oil ONLY when the filter is completely dry.
- Let the filter oil soak through the pores of the foam filter. Then squeeze out excess filter oil to allow air to pass through.
- Once done with all the steps, place the foam filter back in the air box. You may apply sealing grease at the sealing flange of the filter housing before putting everything back in its original position.
Cleaning Process for a COTTON motorcycle air filter:
The first five steps in cleaning a foam versus cotton filter are pretty similar. So in this section, we will jump straight to step #6:
- Step #6: Give the cotton filter a deeper clean using a mild cleansing solution (warm water with a drop of dish soap). Wash off the filter, but be careful not to dent or damage it.
- Step #7: If using a commercial cleaner, apply the filter-appropriate cleaning agent on the filter surface (from the inner side) and allow the substance to sit for about five minutes or so (refer to instructions found on the label for the exact duration). Doing so will enable the air filter cleanser to break down grime and old oil permeating through the cotton fabric.
Do steps #8 and #9 as in the foam filter cleaning process above.
- Step #10: For its drying process, toss the cotton filter in the air to expunge water in its inner layer. Once done, set the filter aside for some time and let it air-dry thoroughly.
Steps #11 to #13 are also similar to the foam filter cleaning process above. A minor difference is that you wipe off excess oil from the filter surface instead of squeezing the filter element.
Doing step #4 is totally your discretion since cotton filters are not as thick as their foam counterparts. However, I strongly recommend adhering to this step whenever you do alternative cleaning of your cotton air filter.
It is also worth noting that using a mild cleansing solution and degreaser/turpentine on air filters is interchangeable. So when deciding, do the step that effectively removes gunk and grime buildup first and the step that deeply cleans the filter surface next.
Recommended Air Filter Cleaning Intervals

Online references reveal different durations regarding the frequency of cleaning motorcycle air filters. Experts and veteran motorheads base the timing on factors like riding conditions, driving habits, motorcycle make, year, displacement, and the quality of the air filter itself. Because of the variety of available information online, I have gone ahead and listed frequency ranges for each type of motorcycle:
| Type of Motorcycle | Frequency (Approximate) |
|---|---|
| Road racers | Every 2,500 – 10,000 miles |
| Off-road/trail riders | Every ride (twice every ride during summer) |
| MX/adventure bikes | Every ride up to 10,000 miles |
| Sportbikes | Every 2,500 – 10,000 miles |
| Dirt bikes | Every ride if doing heavy riding; Every other ride if doing moderate riding; Every 50,000 miles for casual riders |
| Cafe racers/cruisers/touring bikes | Depends on filter condition |
| Scooters | Every 2,500 – 10,000 miles |
| Full-faired/track bikes | Every ride up to 10,000 miles |
| Liter-class/performance bikes | Every ride up to 10,000 miles |
| Motorcycles in general | 2,500 – 20,000 miles |
Savvy motorcyclists share the best practice of cleaning their air filter every 2,500 to 3,000 miles or every oil change. Although not an interval you should necessarily follow, this practice is an excellent pre-emptive approach to the aftereffects of dirty air filters.
Air Filter Cleanup Follow-Throughs
Performing the air filter cleaning process is one thing, but maximizing the life of your newly-scrubbed air filter is another. Let us admit it – every motorcycle owner out there would want to save up on those precious, hard-earned bucks whenever they can. Reusing air filters just would not cut it. Stretching their service life is the next step and would only be made possible by doing the following best practices:
- Regularly wipe down surfaces that accumulate dust and dirt to help take some load off the function of air filters, even if our motorcycles air out every time we ride.
- Place a filter wrap on your air filter to help extend its service life. Filter wraps keep dirt out while only letting clean, particle-free air pass through.
- Store spare filters in a ziplock plastic bag when embarking on a two-day ride. This way, you are guaranteed to have a working air filter replacement.
- If riding conditions are dry, a mineral-type filter oil is the best way to go. This variant may take longer to apply to your filter but has less propensity to dry out.
- Always run your two-wheeler on the highest-octane (but compatible) fuel available. Doing so helps set the stage for spotting dirty air filter symptoms quicker.
More Pointers:
- Oil-based air filter cleaners are best to use when cleaning foam filters. They are also safe for the foam element and the seam glue.
- You may use WD-40 to clean your air filter but never as a substitute for air-filter oil.
- Never use gasoline/petrol, metho, or any solvent you find in your garage to clean your air filter – unless it is a reputable air filter cleaning solvent. Although regular solvent surpasses filter cleaners in its ability to degrease the filter surface, it also breaks down glue seams and the filter element itself (especially true for foam filters).
- Similarly, avoid petroleum-based filter cleaners if using a foam filter – these products will adversely affect the foam element and make glue seams brittle.
Conclusion – How to Clean a Motorcycle Air Filter
Regardless of its make and model, every two-wheeler needs uncontaminated, free-flowing air to breathe for it to run smoothly. And for that to happen, its motorcycle air filter should be clean and in good working condition.
You should now be able to clean your foam or cotton filter on your own. I hope that you find the experience empowering – especially if you have previously found cleaning air filters to be a daunting task!