Dirt Bike Maintenance Tips (How to Make Your Bike Last Longer)
Disclosure: We may get commissions for purchases made through links in this post.
Motorheads often ask questions such as, how many hours should a 4-stroke dirt bike last? Is 500 hours a lot, or even 90 hours? If you think about it, all these queries are driven by the same underlying factor — dirt bike maintenance. Personally, the only time folks would be asking these questions is if they’re new bike owners or haven’t been hands-on in the bike’s upkeep since day one.
Dirt bike maintenance includes detailed checks of stress-prone parts, assessing damage and tightness, ensuring clutch and brake system responsiveness, pre-storage cleanup, and more.
I’ll spotlight best practices from seasoned dirt bike enthusiasts and cover comprehensive discussions of upkeep guidelines and their significance. So whether you’re prepping for a weekend excursion or just about to hit the 90-hour mark on your two-wheeler, I’m confident you’ll benefit from this guide.
Dirt Bike Maintenance Tips
For the most part, motorcycle upkeep doesn’t hinge on the type of two-wheeler you have and is pretty standard across all segments. That said, here are some general maintenance tips for dedicated dirt bike enthusiasts — barring any mechanical or electrical issues and extensive damage to the motorcycle.
Pre-Care
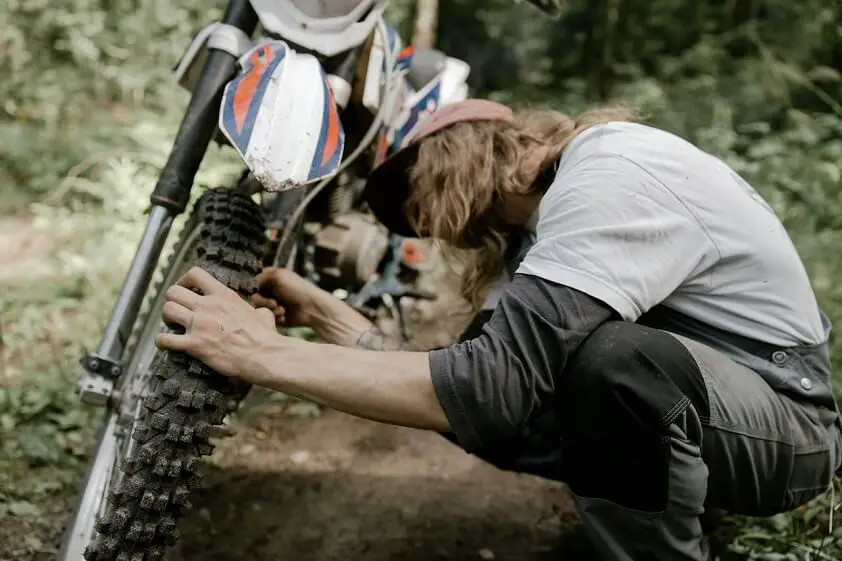
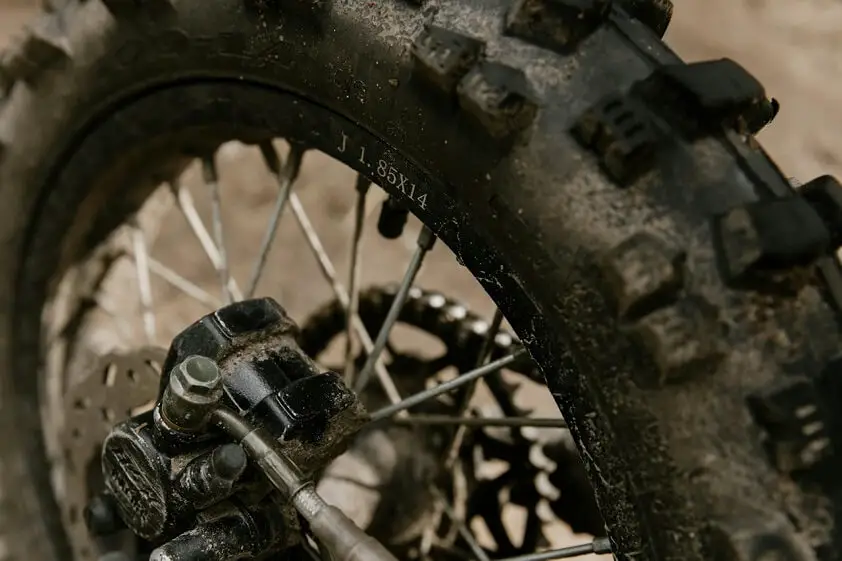
1. Check Tire Pressure.
Before each ride, ensure your tires are properly mounted and inflated to the OEM’s recommended levels. Correct tire pressure is vital to optimal traction and handling. Low pressure, conversely, can lead to poor control, making it challenging to navigate gravel roads and wooded areas (among others). Meanwhile, overinflated tires reduce shock absorption.
As you ensure your cold-tire pressure is up to spec, you should also be noting your tread depth — and whether it suits the type of terrain you will be traversing. If you find no issues, air your tires using a JINKEY Upgrade 4 Tire Pressure Equalizer with Quick Coupler Adaptor (view on Amazon) or a similar tool. Otherwise, repair or replace your knobbies as needed.
2. Fully Charge the Battery.
Similar to off-roading, having a fully charged battery is equally important in dirt biking for the reasons stated below:
- It ensures that your dirt bike’s electric starter or kickstart system can reliably start the engine and that you’re not inconvenienced (especially in remote or off-road locations).
- Various electrical components, such as headlights, taillights, turn signals, and instrumentation, rely on the battery’s power to function correctly. As such, a fully charged battery ensures these systems operate as intended, enhancing safety during rides and in low-light conditions.
- It ensures a consistent and precise fuel-air mixture — especially for dirt bikes featuring electronic fuel injection systems.
- Finally, a fully charged battery alleviates the alternator from undue stress that usually results in premature failure and costly replacements. Furthermore, consistent and appropriate battery charging extends its longevity and helps prevent sulfation — a common issue in lead-acid batteries.
The above bullets are non-exhaustive. Nonetheless, they highlight the importance of having your battery fully charged before hitting the trails. Connecting it to a trickle charger during disuse, maintaining clean terminals, applying a protective spray, and replenishing fluids (applicable to lead-acid batteries) are some ways to give your battery proper care.
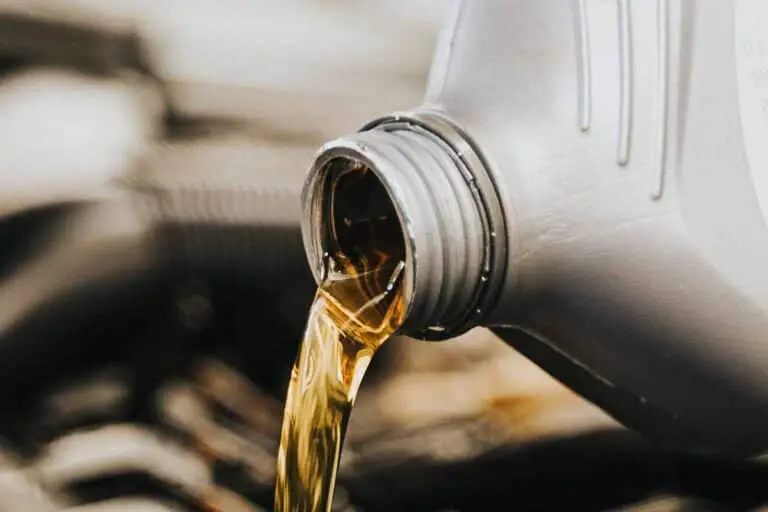
3. Inspect Filters and Fluid Levels.
Double-checking the air filter and engine oil is also paramount in dirt bike maintenance. After all, the air filter prevents dirt, dust, and debris from entering the engine. Regularly inspecting and cleaning or replacing this component helps maintain optimal engine function, enhances fuel efficiency, and extends the engine’s life.
In like manner, properly maintained engine oil ensures the adequate lubrication of critical components, preventing excessive wear and overheating — this includes adherence to oil change intervals. Typically, an oil change is recommended every 10 to 20 hours of riding. However, the timing of this scheduled maintenance may not always coincide with your planned outdoor adventures.
To inspect the air filter, locate the airbox, remove the cover, and visually examine the filter for dirt or damage. Then, clean or replace it as needed. For engine oil, warm up the engine, turn it off, and check the oil level with the dipstick, ensuring it falls within the recommended range. If it’s low, bring it up to spec by adding the appropriate oil type.
Always use filters and oils that meet the manufacturer specifications of your dirt bike model. Additionally, you may refer to this other article for a more detailed rundown of how to properly check your dirt bike oil levels.
4. Gauge Chain and Sprocket Wear.
A well-maintained and properly adjusted chain and sprocket system ensures a smooth and powerful ride on your dirt bike while enhancing safety. In poor conditions, however, the same system can lead to unexpected breakdowns.
That said, regularly assessing the condition of the chain and sprockets should be part of your maintenance checklist. Not only does this step allow riders to replace erring components at the right time, but it also ensures optimal power transmission to the rear wheel, safety, and the prevention of further damage to other drivetrain components.
To properly assess chain and sprocket wear, start by inspecting the chain. Measure slack at the midpoint by pulling it up and down. If it exceeds OEM-recommended specs, it’s time for replacement. Additionally, look for loose or missing rollers on the chain, as these signal wear, too. As for the sprockets, look for wear indicators, such as hooked or pointed teeth, indicating the need for replacement.
5. Verify Brakes.
Regular brake inspection ensures that brake pads, rotors (view on Amazon), and hydraulic components are in good condition, reducing the risk of brake failure and accidents. A thorough brake check also allows riders like yourself to identify and address issues like worn brake pads or contaminated brake fluid before they worsen, saving on repair costs and preserving overall safety during rides.
In properly verifying brakes, start by examining the brake pads for wear. Inspect the thickness of the brake pad material and replace it if it is near or below the OEM-recommended minimum thickness. To add, check for signs of uneven wear, which may indicate brake caliper or rotor problems.
Also, don’t forget to ascertain that the brake lever or pedal has the correct amount of play and that engagement is smooth. Any sponginess or lack of responsiveness in the brake lever/pedal would indicate air in the brake lines, necessitating bleeding, and a brake fluid change.
6. Assess Suspension and Steering Setup.

If the first five steps are in order, examine these systems next. Both must operate efficiently and in sync, as their functionality directly impacts both on-road and off-road performance and safety. Additionally, they endure substantial strain, especially in tougher riding conditions.
Relative to this, a thorough visual inspection applies to the following:
- Forks: Inspect the front forks for any signs of leaks, damage, or excessive wear. Check the fork seals for oil leakage, and make sure the fork tubes are straight and free from dents or bends.
- Shock Absorber: Examine the rear shock absorber for leaks, visible damage, and proper function. Check the rebound and compression settings to ensure they are set according to your riding preferences and chosen terrain.
- Suspension Linkage: Check the suspension linkage for wear and tightness. Ensure all linkage bolts and bearings are in good condition and properly lubricated.
- Steering Head Bearings: Inspect the bearings by gently rocking the handlebars back and forth. If there is excessive play or resistance, the steering head bearings may need to be adjusted or replaced.
- Handlebars: Examine the handlebars for any bending or damage. Ensure they are securely mounted to the triple clamps and that all fasteners are tight.
- Triple Clamps (view on Amazon): Inspect the triple clamps (a.k.a. upper and lower fork clamps) for any signs of cracks, damage, or loose bolts. Properly aligned triple clamps are essential for steering stability.
- Swingarm and Linkage Bearings: Check the swingarm and linkage bearings for wear, proper lubrication, and tightness. You may also want to watch for signs of corrosion, deterioration, foreign particles in bearings and seals, and misalignment.
- Wheel Alignment: Ensure that the front and rear wheels are properly aligned. Out-of-alignment wheels can cause handling problems and uneven tire wear.
- Steering Dampers: If your dirt bike is a high-performance, motocross, or supercross type, chances are it’s equipped with a steering damper. If so, verify its settings and condition. A well-functioning damper helps reduce headshake and provides better control. Hence, ensure it’s in tip-top shape.
The approach to inspecting these components may differ depending on the type of dirt bike you have. A high-performance Enduro with aftermarket suspension (view on Amazon), for instance, may require additional checks for potential looseness or alignment issues. Note, too, that some of these items (like the steering damper) may not apply to all dirt bike models.
7. Examine Fasteners and Hardware.
Inspecting fasteners and hardware is crucial for safety and performance. Over time, these components can loosen or wear out due to vibrations and off-road stress. Loose fasteners can lead to accidents and mechanical failures, so regular inspection is essential.
It’s ideal to consult the manual to identify key locations and systematically check and tighten each fastener. Using the right tools, start from the steering controls — moving through the frame, bodywork, and components. Focus on high-stress areas like the handlebars, footpegs, suspension components, and engine mounts. Replace damaged components while following OEM torque settings and use thread-locking compounds when needed to prevent vibration-induced loosening.
8. Scrutinize Control Cables.
This maintenance step ensures that the control cables, including the throttle and clutch cables, are in good condition and properly adjusted. Control cables transmit rider input to the engine and other components. As such, maintaining them in good condition is integral to a safe and enjoyable dirt biking experience.
Verifying control cables entails checking for signs of wear, fraying, or kinks along the entire length of the cables while ensuring that they’re adequately lubricated and properly tensioned. The process also includes ascertaining that cable routing and fasteners aren’t bent or obstructed, as well as testing for responsiveness. If damaged or poorly adjusted, control cables can affect throttle response and clutch engagement and disengagement — hence, the need for proper upkeep.
9. Do a Fuel System Check.
While the fundamental steps for both 2-stroke and 4-stroke motorcycles involve inspecting the fuel tank, lines, and filters and ensuring they’re clean and properly tuned, the specific components and methods may vary based on the type of power mill and fuel delivery system (carburetor or fuel injection) used in the dirt bike. Below is a summary of the process for each engine type:
2-Stroke Dirt Bike:
- Examine the fuel tank for any visible damage, leaks, or contaminants. Verify the tank is clean and free from rust or debris that could clog the fuel system.
- Inspect the fuel lines for cracks, leaks, or signs of aging. Replace any damaged or deteriorated lines as needed.
- If your dirt bike has an inline fuel filter, check it for clogs or contaminants. Replace the filter if it is dirty.
- If equipped with a carburetor, remove and inspect it for cleanliness and any clogs in the jets and passages. Clean or rebuild the carburetor as necessary.
- Ensure that you have the correct fuel-to-oil mixture ratio. Verify that the oil injection system (if equipped) is functioning properly.
4-Stroke Dirt Bike:
- If equipped with EFI, inspect the fuel injection system, including the fuel pump, injectors, and associated components, for any issues or clogs. Use an OEM-recommended fuel system cleaner.
- Regardless of engine type, inspect the fuel tank for debris or contaminants that could affect fuel quality.
- Examine the fuel filter, if applicable, for clogs or contamination. Replace the filter if it is dirty.
- For EFI-equipped engines, ensure the air-fuel mixture is correctly balanced, which may involve adjusting the fuel injection system settings.
10. Test Lighting and Electricals.
Lastly, test the dirt bike’s lights, horn, and other electrical components for proper functioning.
Start by turning on the ignition and engaging the bike’s electrical system. Inspect the entire lighting assembly (including turn signals and other warning lights) to confirm they illuminate as intended. While at it, check for any dim or flickering lights. Additionally, ensure that the horn, indicators, and other electrical accessories work seamlessly.
Aftercare
Dirt bike post-care is pretty much the same steps as above but done after every ride. Of course, there’d be certain steps that wouldn’t apply — like steps #5 and #10. However, the rest are up for an encore. Here’s a list of steps similar to the above but worded (and arranged) differently:
1. Clean the Bike Thoroughly
After a ride, clean your bike to remove dirt, mud, and debris. This prevents corrosion and keeps moving parts functioning smoothly.
2. Lubricate Chain and Moving Parts
Apply chain lubricant to the drive chain and pivot points. Lubricate control cables and any other moving parts that need it. This reduces friction and extends the life of components.
3. Inspect and Tighten Fasteners
Recheck all bolts, nuts, and fasteners for tightness. Vibrations during a ride can cause them to loosen, so it’s essential to maintain proper torque.
4. Reinflate Tires
Pump up the tires to their recommended cold-tire pressure as soon as you get home. Do the same thing the following day after tire pressure loss has already occurred. Make sure to also examine the tires for cracks, gouges, or foreign objects while ensuring that all axle nuts and cotter pins are tightened well enough to secure the wheels in place.
5. Check for Damage
Inspect the frame, forks, swingarm, and other structural components for any damage, cracks, or signs of stress. Address issues promptly to prevent further damage.
6. Monitor Coolant and Radiator
Ensure the coolant level is adequate, and the radiator is clean. Overheating can cause engine damage, so proper cooling system maintenance is vital.
7. Inspect and Clean Air Filter
After riding in dusty areas, clean or replace the air filter again. A clogged air filter restricts airflow and decreases engine performance.
8. Perform a Brake Pad Check
Assess the condition of the brake pads. If worn significantly, replace them to maintain effective braking performance.
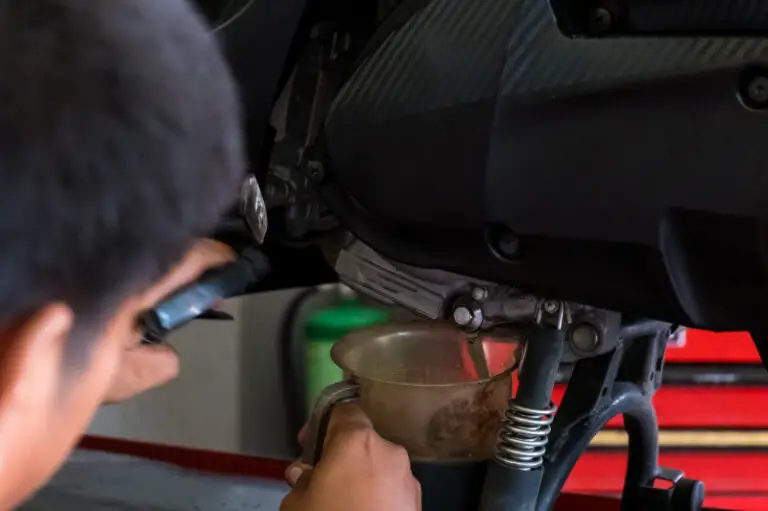
9. Change Engine Oil and Filter (Optional)
Regularly change the engine oil and filter per the manufacturer’s recommendation. This step is crucial for preserving engine longevity and performance. Also, note that doing this after every ride isn’t necessitated — unless the dirt bike’s application is particularly rigorous or it’s the two-wheeler’s maintenance schedule.
10. Do Suspension Maintenance
Periodically service the suspension components, including fork seals and shock absorbers. This ensures optimal ride quality and handling.
11. Store the Bike Properly
Store your dirt bike in a dry, clean place, and if possible, cover it to protect it from dust and moisture. Disconnect the battery or make use of a trickle charger to maintain battery health during storage.
The main difference between pre-care and post-care, if any, is that the cleanup and storage of the two-wheeler are added to the steps. I’ve already extensively discussed how to properly wash a motorcycle in a previous article. Therefore, the only thing left to cover under post-care maintenance is properly storing a dirt bike after a long day on the trails.
(TIP: For outside storage, you may head over to my other post on How to Store a Motorcycle Outside after reading this guide.)
As opposed to what you may have expected, however, I won’t be enumerating a 10-step process on proper in-door motorcycle storage. Instead, I’ll provide tips on how to guarantee that storage (particularly if it’s extended) won’t be detrimental to the condition of your dirt bike or any of its components. Here they are, as promised:
Fuel Stabilization
Not all dirt bikes can ingest fuel stabilizers. But if yours can, add a fuel stabilizer to the tank. Run the engine for a few minutes to distribute the stabilizer through the fuel system. Doing this prevents fuel degradation during storage.
Oil Change
Consider changing the engine oil and filter before storing your motorcycle — especially if it’s close to the recommended service interval. Fresh oil helps prevent corrosion and maintains engine health.
Battery Protection
If your dirt bike has a battery, disconnect it or use a trickle charger to maintain its charge. Keep the battery in a cool, dry place.
Elevation
Use a stand, paddock (view on Amazon), or lift to keep the dirt bike tires off the ground. This prevents flat spots on the tires and improves stability during storage.
Cover
Finally, use an Aprilia OEM Premium Indoor Motorcycle Cover (view on Amazon) or similar motorcycle cover to shield your bike from dust and protect it from UV exposure. Ensure that the cover is clean and free of debris before use.
Conclusion — Dirt Bike Maintenance Tips
While seemingly laborious and repetitive, the rewards you gain from executing the above steps meticulously and consistently will justify the time and patience invested in this recurring task. All things considered, savoring the open air atop a dirt bike that operates flawlessly and dependably is unparalleled. Achieving this, however, demands your commitment both on and off the pavement.